You’re only one person and answering every single call isn’t always the most effective method.
With an Auto Attendant Menu, your callers will be greeted with a recording to guide your callers in the right direction.
Something like:
Thanks for calling! Press 1 to speak with sales, press 2 to speak with customer support or stay on the line to leave us a voicemail.
You can enter a different contact phone number for each key on the keypad!
Your caller presses their desired option and is connected to your business.
Here are the steps on how to transfer a number to NumberBarn from another service provider and set up an Auto Attendant Menu.
What is porting?
Porting means transferring your phone number from one service provider to another. Let’s say your number is with Tomato Wireless. You will port your active number from Tomato Wireless to NumberBarn. The number will eventually no longer be with Tomato Wireless and you’ll no longer pay them for service. Instead, you’ll pay NumberBarn. This process takes anywhere from 3-10 business days.
Which plan includes an Auto Attendant Menu?
The NumberBarn Call Forwarding plan is the only plan that includes an Auto Attendant Menu. The Auto Attendant Menu will use minutes on your plan. Depending on your expected call volume, you can determine which plan will work best for you by taking this quiz:
Our call forwarding plans are broken down by minutes per number per month:
- 600 minutes of call forwarding for $6.99/month + tax
- Unlimited call forwarding* for $19.99/month + tax
How to begin
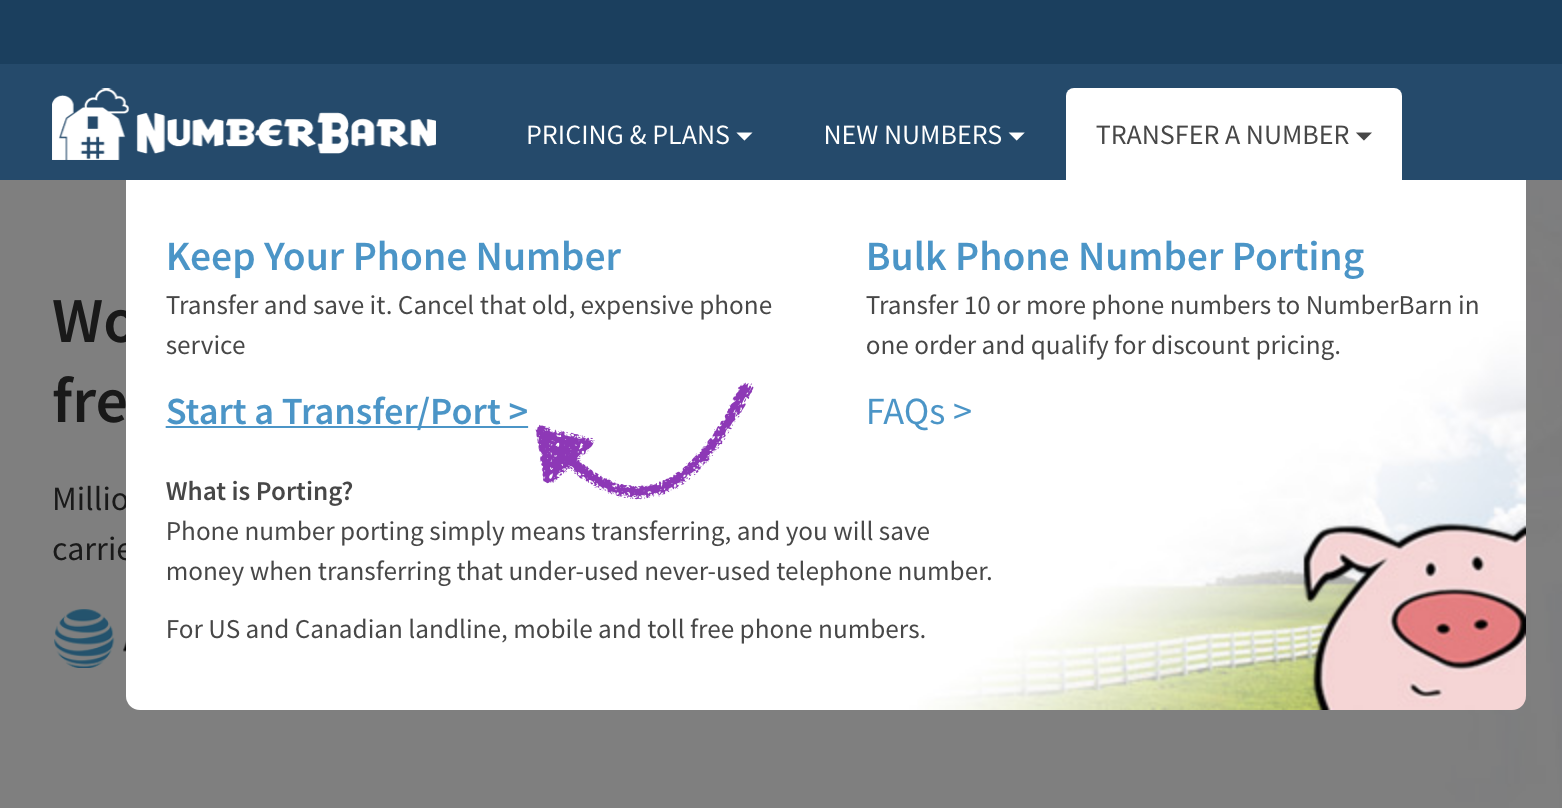
- From our main website, https://www.numberbarn.com, select Transfer a Number.
- Select Start a Transfer/Port.
- Enter the phone number you would like to port. Hint: Hit the tab key to enter numbers into the next box.
- Select the Check button.
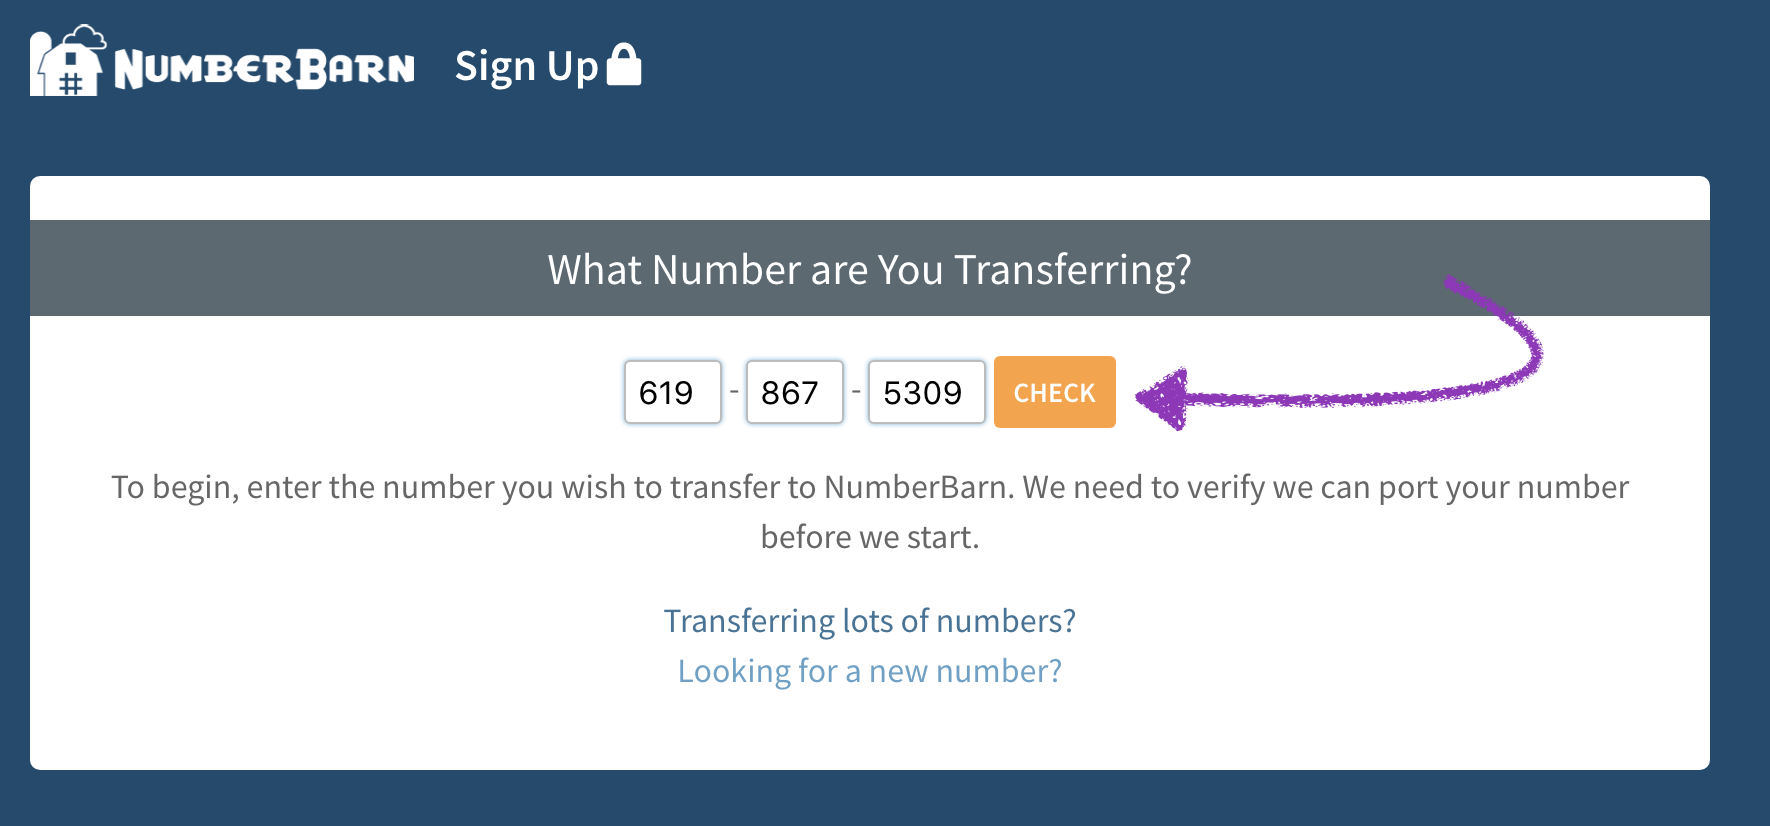
We check to make sure we can support the city and state of your number on our network. When you select the Check button, we do not check:
- If your number is active
- If your number is portable
- If you have any contractual obligations or service bundles on your account
The items above are your responsibility to verify, as a phone number owner. If you’re not sure, you’ll want to check with your current service provider.
- If you see the green checkmark, great! You can begin your port request to NumberBarn.
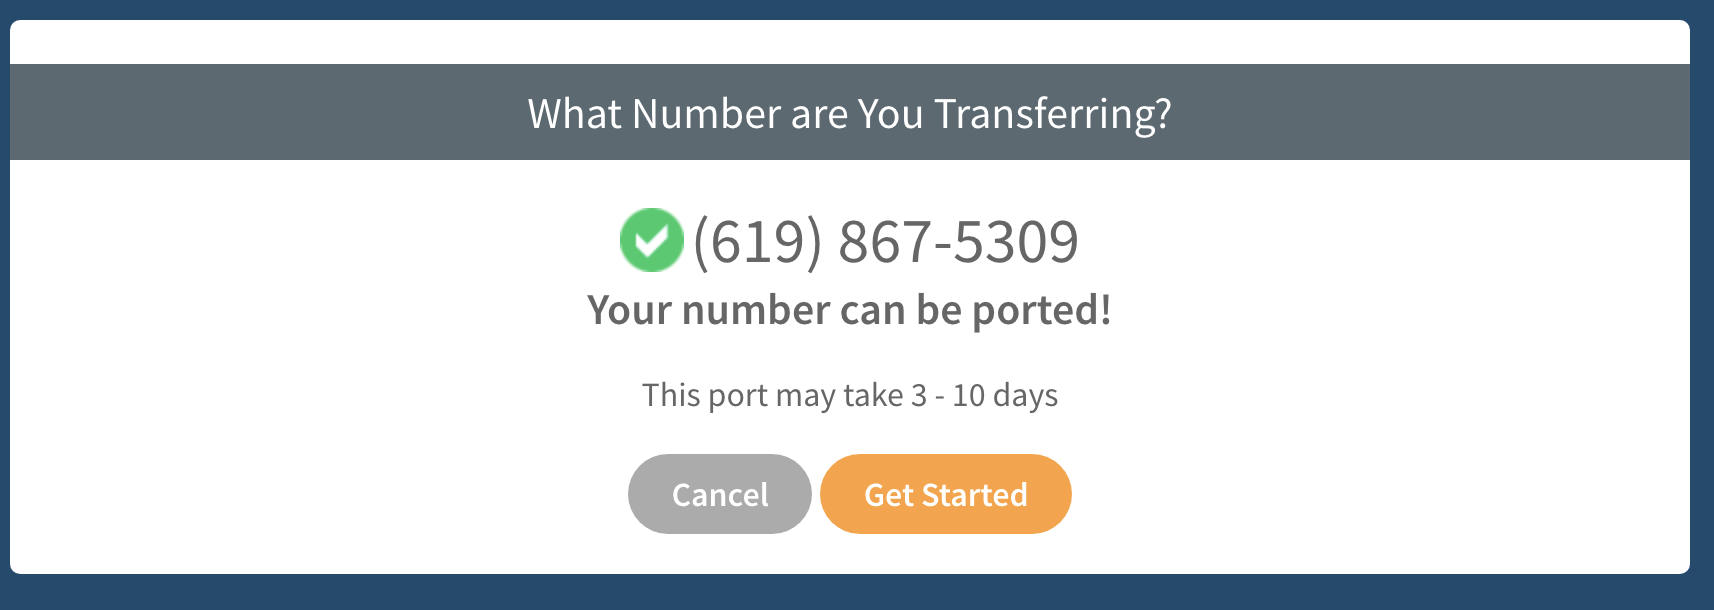
- If you see a red box, it means we do not support your area yet. We might be able to make some magic happen. Please reach out to our customer support for assistance.
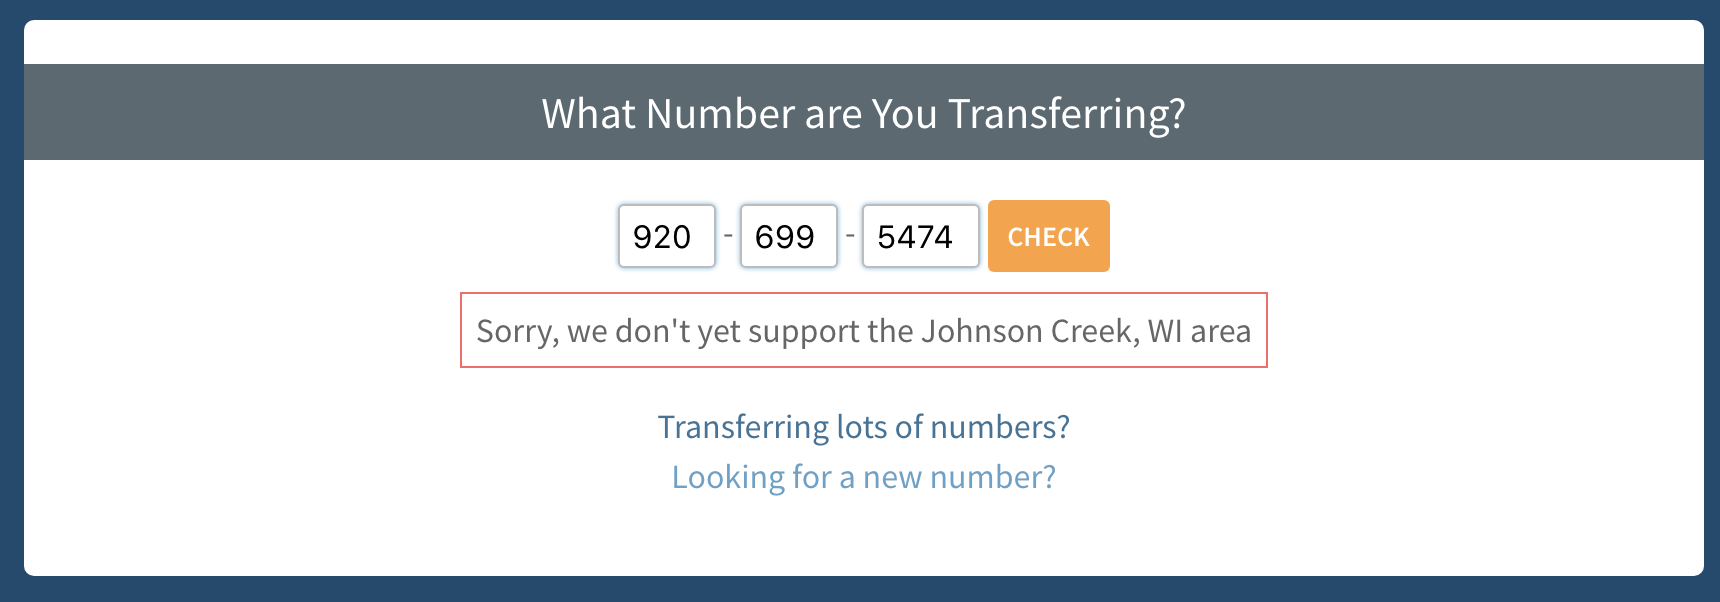
For those with a green checkmark, please continue to read ahead for the next steps:
- Select the Get Started button to go to the next step.
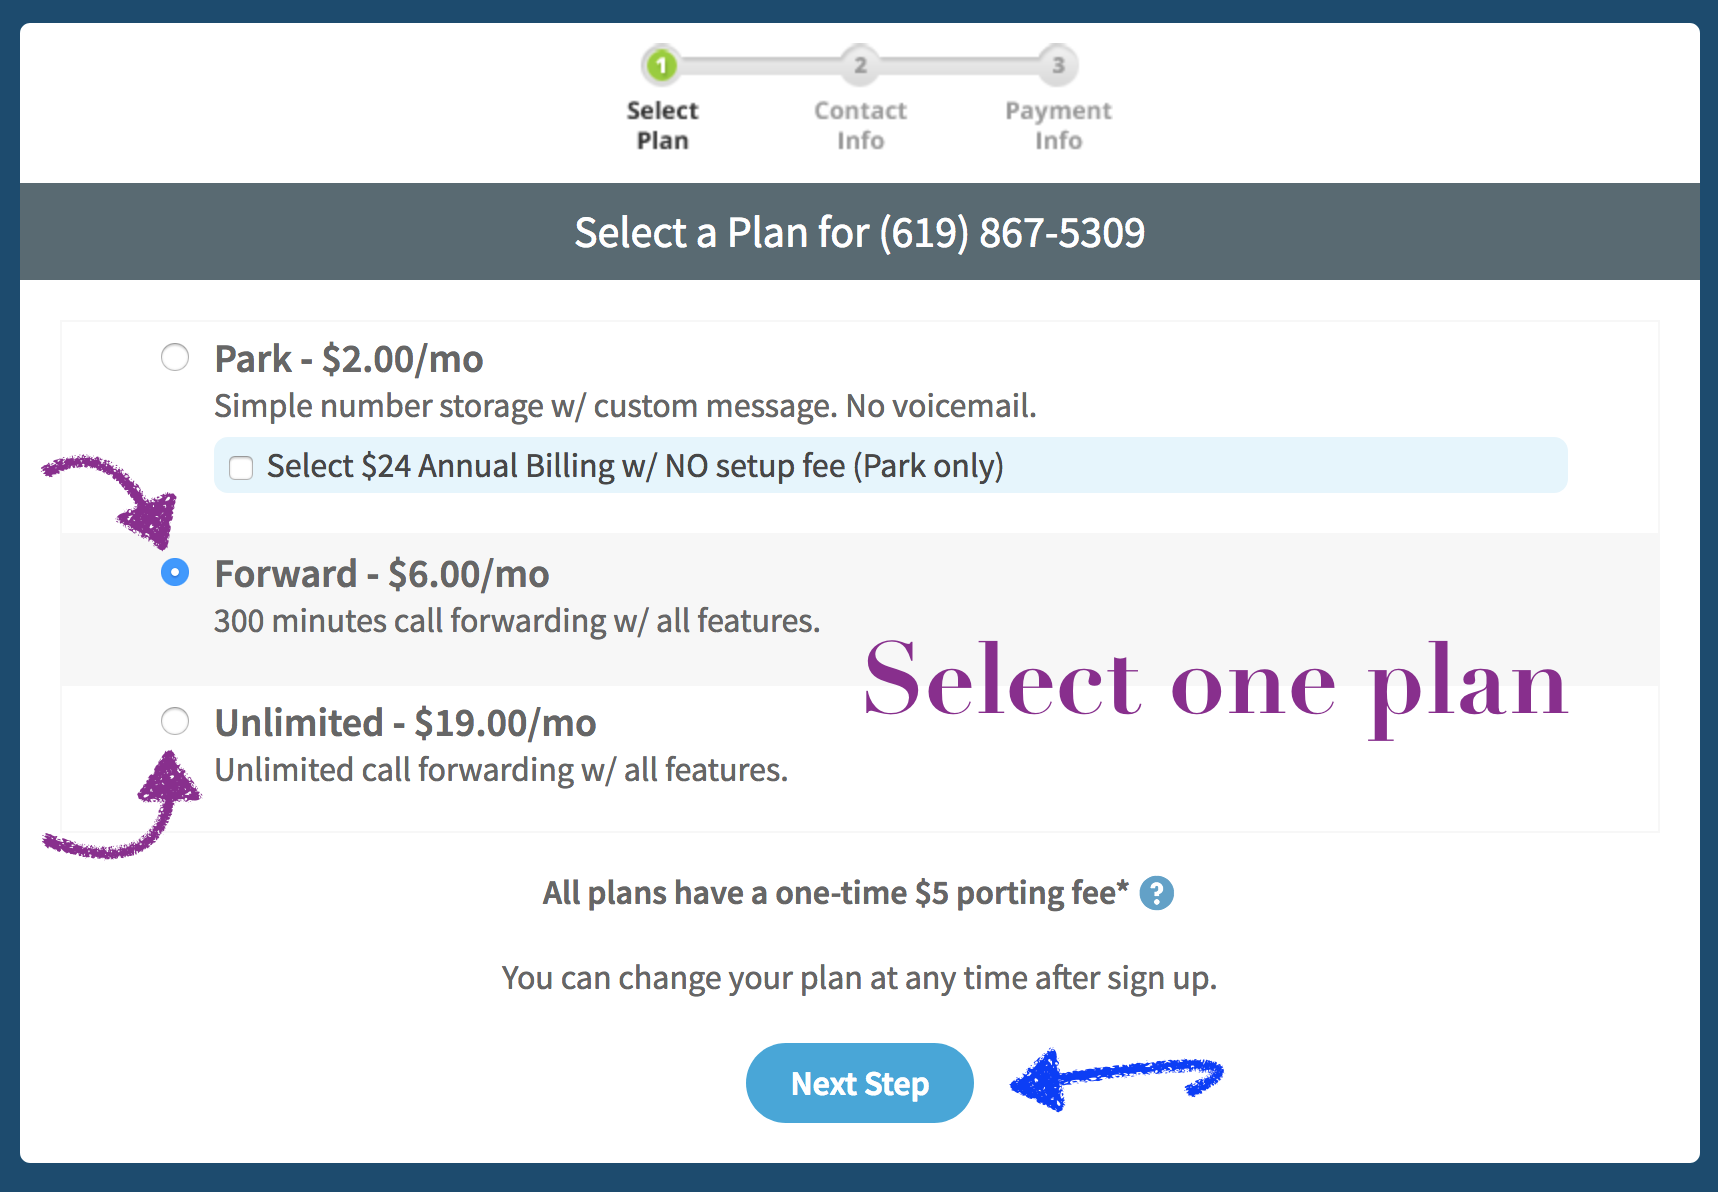
- Select the a Call Forwarding plan.
- Select Next Step.
- Enter the contact information that is on file with your current provider. Note the information on this page must match what is currently on file with your existing provider.
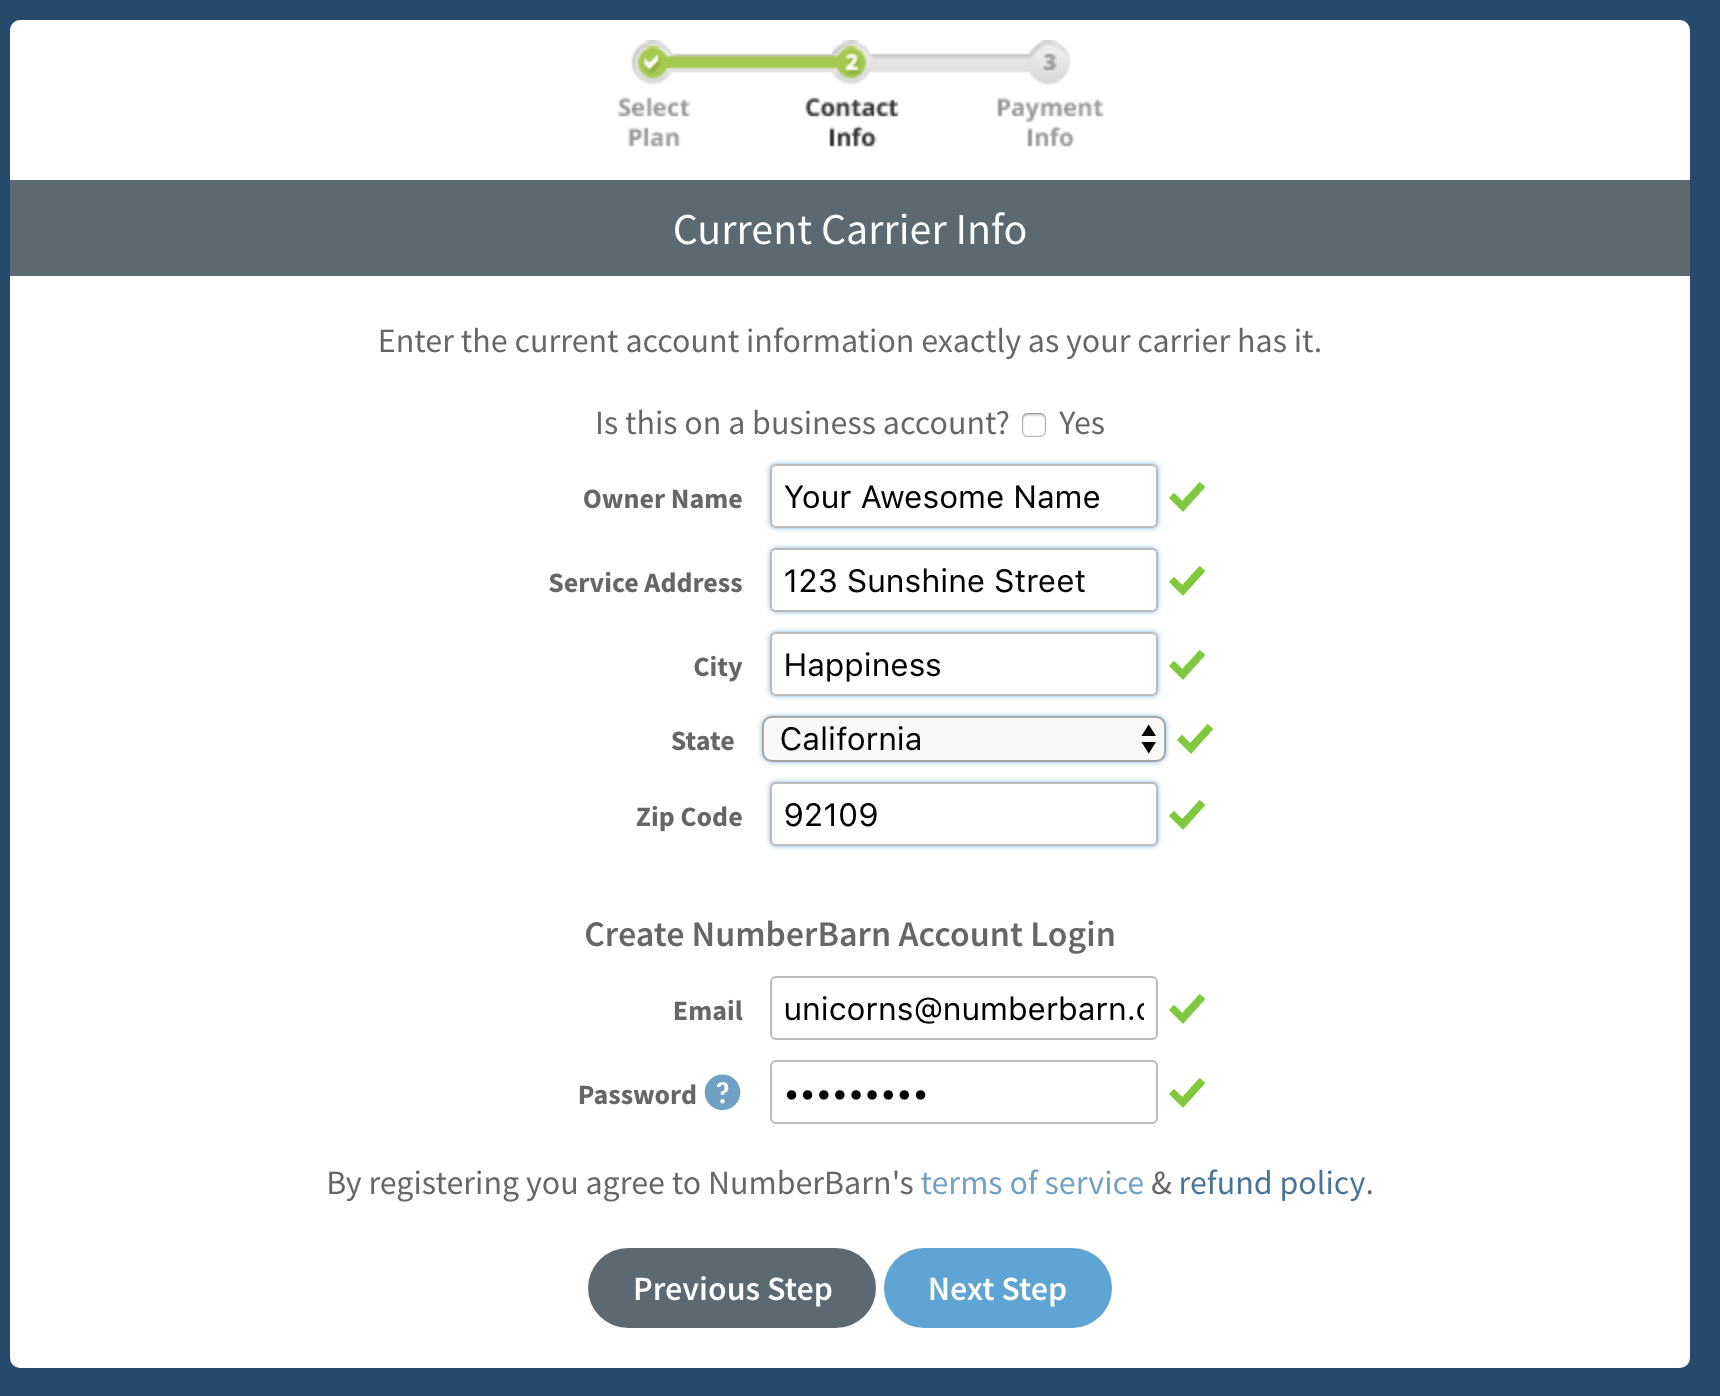
- Enter the email address to place on file in your new account. Note the email you enter here will also be the login to your account and the email on file for notifications.
- Enter a password. Passwords must be at least 6 characters and contain at least one letter and one number.
- A green checkmark mean your information fits into our text fields. If you see a red checkmark, it means there is an error with your information.
- Select Next Step.
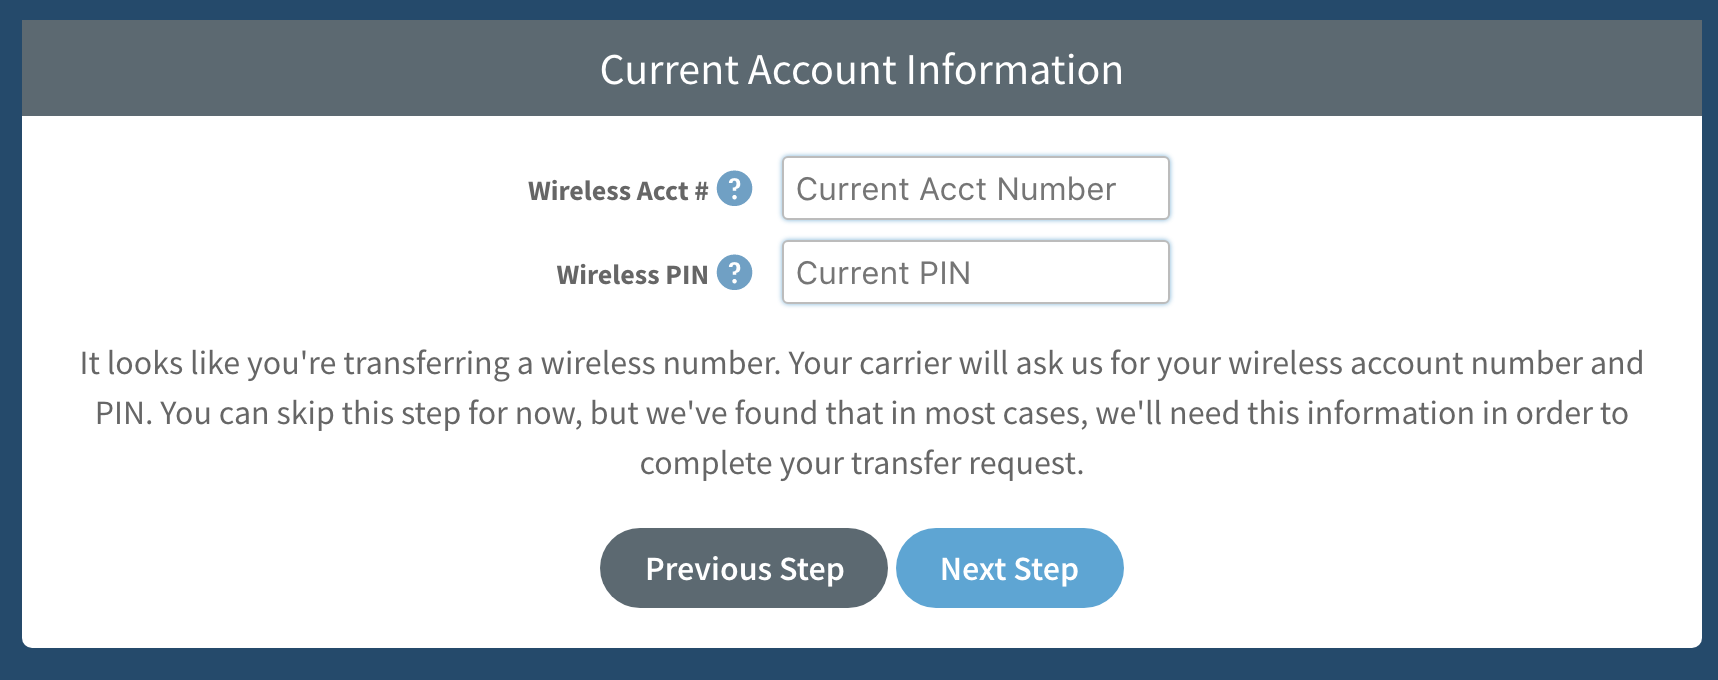
- If the number you are porting is a wireless number, enter your account number and PIN.
- Select Next Step.
- Note the account number and PIN are required by your current service provider to port away and only used for internal purposes. They will not be stored on your NumberBarn account.
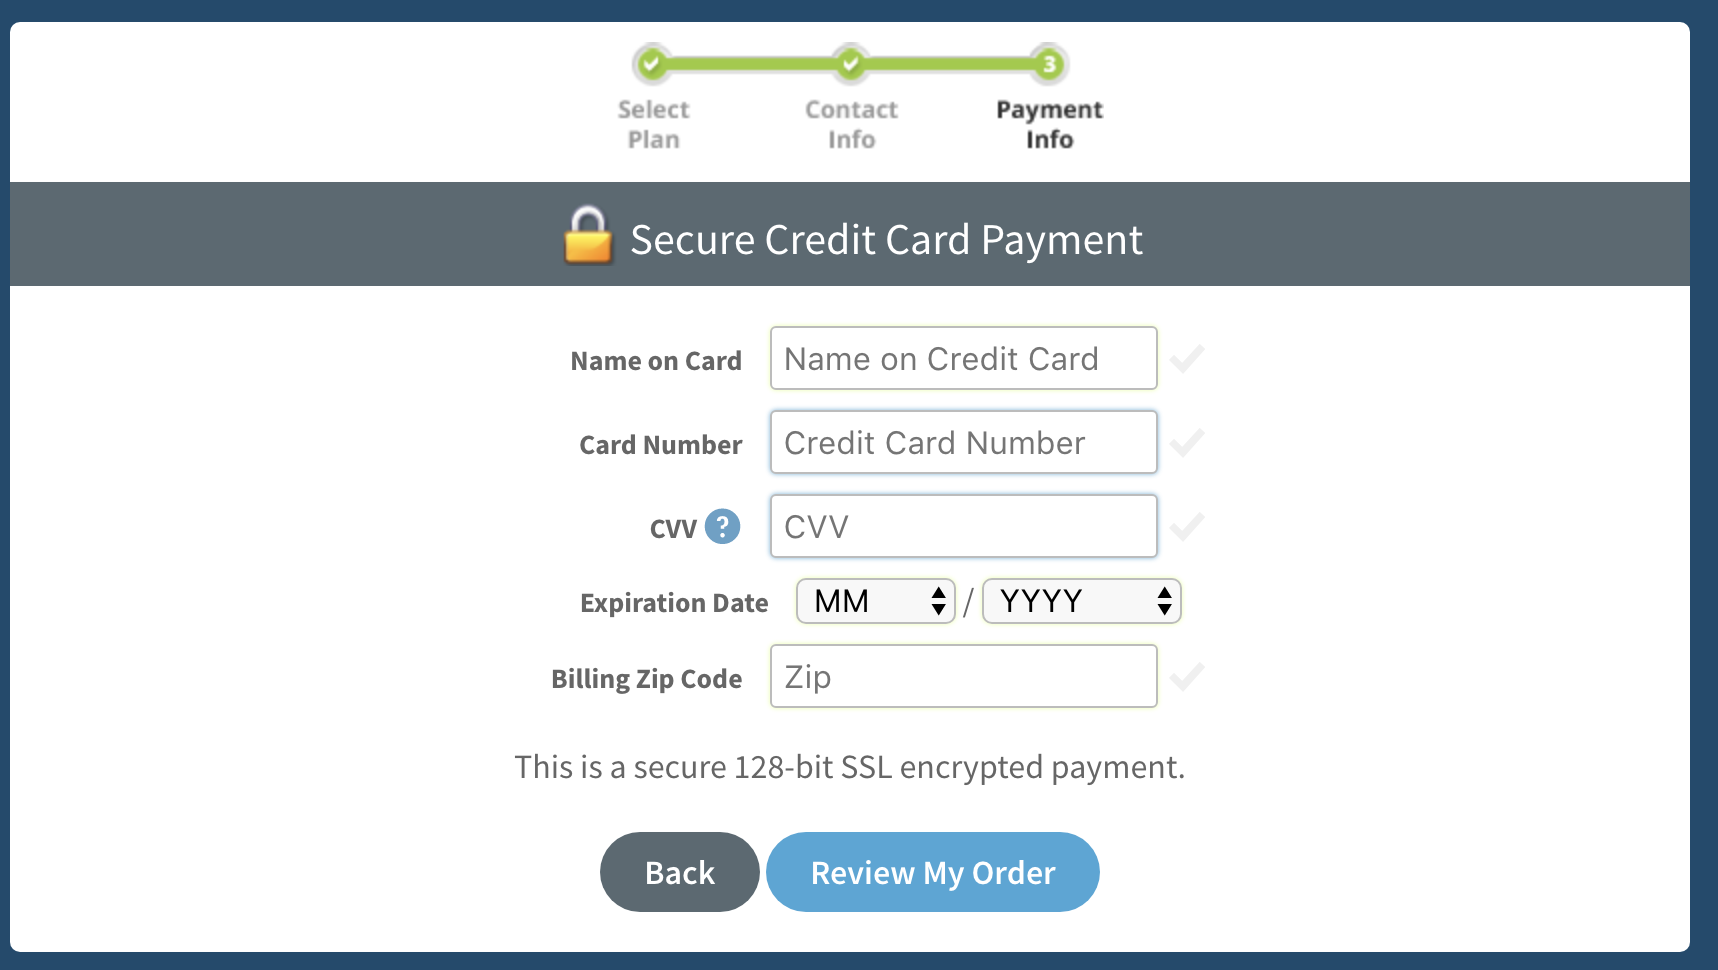
- Enter your payment information.
- We will bill you when your number port completes to your account and then on a monthly basis around that same date every month.
- Select Review My Order.
- If you need to make any changes, select edit.
- If everything looks good, select Place My Order.
What happens next: Authorize your Port Request
Congrats! You have successfully initiated your port request. Now, you must verify your number and authorize the port. This tells us that you are the rightful owner of the phone number and gives us permission to submit your port to your current provider for review. Here’s how to make that happen:
What happens next: Waiting for a status update
After you have authorized your number port, we send the port request to your current provider for review.
- Do not cancel your number with your current service provider.
- When they approve the port, we’ll notify you of the date in which it is scheduled to port.
- If the port is rejected, we’ll notify you and let you know why.
- Porting takes anywhere from 3-10 business days to complete.
Configure your settings
During the time you are waiting for a status update, you can configure your number settings with the Auto Attendant Menu. We recommend the proactive step of doing this prior to your number porting.
Here’s how:
- Login to your account
- Select Numbers
- Select on your number
- Select the Calls
- Locate Send all calls to
- Select A menu from the drop down menu
- Select Edit Menu
Required Menu Setup
Using the menu requires an outgoing message to be played when a caller dials your number. The menu will not function without it. Select Choose file to upload button to upload your custom file.

Comments
0 comments
Article is closed for comments.